Feature Development
This is a step-by-step walkthrough of developing a feature from scratch, taking advantage of the most commonly used Clutch capabilities across the frontend and backend. Familiarity with concepts from the Architecture Reference will help, so it is recommended to skim there first, or refer back to it throughout this tutorial.
⏲️ Estimated time to complete: ~30 minutes
This guide should work for a custom gateway or Clutch core as the directory structure is the same for both. In general, starting with a custom gateway is a good idea and recommended for this guide.
If you get lost at any point all of the files referenced in this tutorial can be found in the examples.
The New Feature
The goal of this tutorial is to build a visual search on top of AmiiboAPI.
Users will start by searching for the name of the item they are interested in. Users can search with a simple text query.
The search will return a list of results, after which the user can pick a single result to see full details on.
Design and Implementation
1. Draw a Wireframe
Start by creating a low fidelity wireframe of the new feature. This helps to gather requirements and feedback from stakeholders as well as focus the implementation.
Get out a pen and paper or use a drawing tool. Popular options include draw.io and Google Drawings.
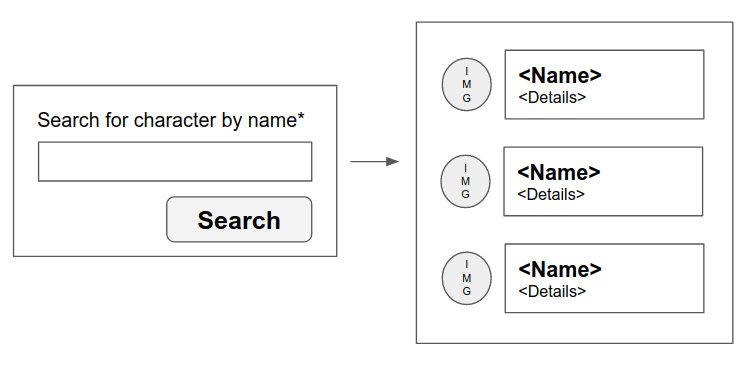
From the diagram, it's clear that there is only one API endpoint to define. The user provides input on the first step and sees a list of results on the second step.
2. API: Define the Schema
Now it's time to determine how information will be presented to the frontend from the backend.
In this example, it would be easy enough to call the API directly from the frontend. However, in order to illustrate Clutch concepts, all calls will be proxied through the Clutch backend. This would normally provide authentication, authorization, auditing, logging, stats, additional input validation, API token handling, etc, none of which are strictly needed for this example. Following the guide should reinforce Clutch concepts albeit with a toy example.
For the reasons stated above, the API defined below will largely look identical to the provider's API.
Boilerplate
Clutch uses protobuf for interface definitions. An empty definition is provided below.
syntax = "proto3";

package clutch.amiibo.v1;

option go_package = "github.com/{path_to_gateway}/backend/api/amiibo/v1;amiibov1";

import "google/api/annotations.proto";

service AmiiboAPI {}
- The path of the API file should correspond to the path of the API itself. e.g.
/v1/amiibomaps toapi/amiibo/v1/. - The header of the file will always starts with the
syntaxspecifier. Clutch always usesproto3. - The
packagedirective will also map directly to the filename. go_packageoption make importing multiple packages a little less confusing by giving a default import name other thanv1.serviceis the group of APIs that share the same underlyingstructand defines the gRPC service.
Endpoints
Next, add the endpoint definitions, including the Google API annotation. Added lines are highlighted below.
syntax = "proto3";

package clutch.amiibo.v1;

option go_package = "github.com/{path_to_gateway}/backend/api/amiibo/v1;amiibov1";

import "google/api/annotations.proto";

service AmiiboAPI {
  rpc GetAmiibo (GetAmiiboRequest) returns (GetAmiiboResponse) {
    option (google.api.http) = {
      post : "/v1/amiibo/getAmiibo"
      body : "*"
    };
  }
}

message GetAmiiboRequest {}

message GetAmiiboResponse {}
- Clutch always uses
postfor the method to simplify the mapping between gRPC and HTTP endpoint names.
Request and Response
Now fill in the request and response. protoc-gen-validate message options are used for input validation. Added lines are highlighted below.
syntax = "proto3";

package clutch.amiibo.v1;

option go_package = "github.com/{path_to_gateway}/backend/api/amiibo/v1;amiibov1";

import "google/api/annotations.proto";
import "validate/validate.proto";

service AmiiboAPI {
  rpc GetAmiibo (GetAmiiboRequest) returns (GetAmiiboResponse) {
    option (google.api.http) = {
      post : "/v1/amiibo/getAmiibo"
      body : "*"
    };
  }
}

message GetAmiiboRequest {
  string name = 1 [ (validate.rules).string = {min_bytes : 1} ];
}

message GetAmiiboResponse {
  repeated Amiibo amiibo = 1;
}

message Amiibo {
  string character = 1;
  string name = 2;
  string amiibo_series = 3;
  string image_url = 4;

  enum Type {
    UNSPECIFIED = 0;
    CARD = 1;
    FIGURE = 2;
    YARN = 3;
  }
  Type type = 5;
}
- Only use input validation on input objects. Input validation is superfluous on response objects.
Generate the Code
With the API definition complete, the code can be generated for the frontend and backend. From the Clutch root, run:
make api
The resulting generated code will be in:
frontend/api/src/index.js, the unified bundle of all frontend generated objects.backend/api/amiibo/v1/, theamiibov1package.
3. Backend: Implement the APIs
On the backend, a service is needed to interact with the API and a module is needed to service the API endpoints defined in protobuf.
The module is the implementation of the API endpoints defined in the protobuf.
Services are reuseable clients for external data or services. In that way, this example is a bit contrived for the purposes of illustrating Clutch concepts.
It is acceptable to call the third-party service directly from the module to simplify the code if there is no need for substitution via interface or there are not multiple modules calling into a service. Refactoring from a combined module is not that hard if the need does arise in the future.
Service
The service code is fairly straightforward, especially if you're familiar with Go. Of note are the New method and the Name. The signature of New is the same for every service, and makes the service usable in the Clutch configuration.
Also note that the Client interface freely makes use of the generated objects from the API.
package amiibo

import (
    "context"
    "encoding/json"
    "fmt"
    "io/ioutil"
    "net/http"
    "strings"

    "github.com/golang/protobuf/ptypes/any"
    "github.com/uber-go/tally/v4"
    "go.uber.org/zap"
    "google.golang.org/grpc/status"

    amiibov1 "github.com/{path_to_gateway}/backend/api/amiibo/v1"
    "github.com/lyft/clutch/backend/service"
)

const Name = "gateway.service.amiibo"

const apiHost = "https://www.amiiboapi.com"

func New(cfg *any.Any, logger *zap.Logger, scope tally.Scope) (service.Service, error) {
    return &client{http: &http.Client{}}, nil
}

type Client interface {
    GetAmiibo(ctx context.Context, name string) ([]*amiibov1.Amiibo, error)
}

type client struct {
    http *http.Client
}

type RawResponse struct {
    Amiibo []*RawAmiibo `json:"amiibo"`
}

type RawAmiibo struct {
    Character    string `json:"character"`
    AmiiboSeries string `json:"amiiboSeries"`
    Name         string `json:"name"`
    Image        string `json:"image"`
    Type         string `json:"type"`
}

func (r RawAmiibo) toProto() *amiibov1.Amiibo {
    t := strings.ToUpper(r.Type)
    return &amiibov1.Amiibo{
        Name:         r.Name,
        AmiiboSeries: r.AmiiboSeries,
        ImageUrl:     r.Image,
        Character:    r.Character,
        Type:         amiibov1.Amiibo_Type(amiibov1.Amiibo_Type_value[t]),
    }
}

func charactersFromJSON(data []byte) ([]*amiibov1.Amiibo, error) {
    raw := &RawResponse{}
    if err := json.Unmarshal(data, &raw); err != nil {
        return nil, err
    }
    ret := make([]*amiibov1.Amiibo, len(raw.Amiibo))
    for i, a := range raw.Amiibo {
        ret[i] = a.toProto()
    }
    return ret, nil
}

func (c *client) GetAmiibo(ctx context.Context, name string) ([]*amiibov1.Amiibo, error) {
    url := fmt.Sprintf("%s/api/amiibo?character=%s", apiHost, name)
    req, err := http.NewRequestWithContext(ctx, http.MethodGet, url, nil)
    if err != nil {
        return nil, err
    }
    resp, err := c.http.Do(req)
    if err != nil {
        return nil, err
    }
    defer resp.Body.Close()

    body, err := ioutil.ReadAll(resp.Body)
    if err != nil {
        return nil, err
    }
    if resp.StatusCode != 200 {
        return nil, status.Error(service.CodeFromHTTPStatus(resp.StatusCode), string(body))
    }
    return charactersFromJSON(body)
}
Module
The module is instantiated after the service when the gateway starts. This allows the module to fetch a reference to any services it needs, which are then stored on the module instance for use during requests.
package amiibo

import (
    "context"
    "errors"

    "github.com/golang/protobuf/ptypes/any"
    "github.com/uber-go/tally/v4"
    "go.uber.org/zap"

    amiibov1 "github.com/{path_to_gateway}/backend/api/amiibo/v1"
    "github.com/lyft/clutch/backend/module"
    "github.com/lyft/clutch/backend/service"
    amiiboservice "github.com/{path_to_gateway}/backend/service/amiibo"
)

const Name = "gateway.module.amiibo"

func New(*any.Any, *zap.Logger, tally.Scope) (module.Module, error) {
    svc, ok := service.Registry["gateway.service.amiibo"]
    if !ok {
        return nil, errors.New("no amiibo service was registered")
    }

    client, ok := svc.(amiiboservice.Client)
    if !ok {
        return nil, errors.New("amiibo service in registry was the wrong type")
    }

    return &mod{client: client}, nil
}

type mod struct {
    client amiiboservice.Client
}

func (m *mod) Register(r module.Registrar) error {
    amiibov1.RegisterAmiiboAPIServer(r.GRPCServer(), m)
    return r.RegisterJSONGateway(amiibov1.RegisterAmiiboAPIHandler)
}

func (m *mod) GetAmiibo(ctx context.Context, request *amiibov1.GetAmiiboRequest) (*amiibov1.GetAmiiboResponse, error) {
    a, err := m.client.GetAmiibo(ctx, request.Name)
    if err != nil {
        return nil, err
    }
    return &amiibov1.GetAmiiboResponse{Amiibo: a}, nil
}
Gateway Registration
Components
The module and service must be in the component list at compile time in order for the binary to be able to read instantiate them from config based on their respective names.
package main

import (
    "github.com/lyft/clutch/backend/cmd/assets"
    "github.com/lyft/clutch/backend/gateway"
    amiibomod "github.com/{path_to_gateway}/backend/module/amiibo"
    amiiboservice "github.com/{path_to_gateway}/backend/service/amiibo"
)

func main() {
    flags := gateway.ParseFlags()
    components := gateway.CoreComponentFactory
    components.Modules[amiibomod.Name] = amiibomod.New
    components.Services[amiiboservice.Name] = amiiboservice.New

    gateway.Run(flags, components, assets.VirtualFS)
}
Config
Add the components to the config.
...
services:
  ...
  - name: gateway.service.amiibo
modules:
  ...
  - name: gateway.module.amiibo
...
Test!
Run the gateway with the new components:
make backend-dev
With the gateway still running, try the following in a separate shell:
curl -X POST localhost:8080/v1/amiibo/getAmiibo -d '{"name": "peach"}'
A number of results should appear in the terminal. Also try passing an empty name to see how input validation is automatically applied from the protobuf annotation of the field.
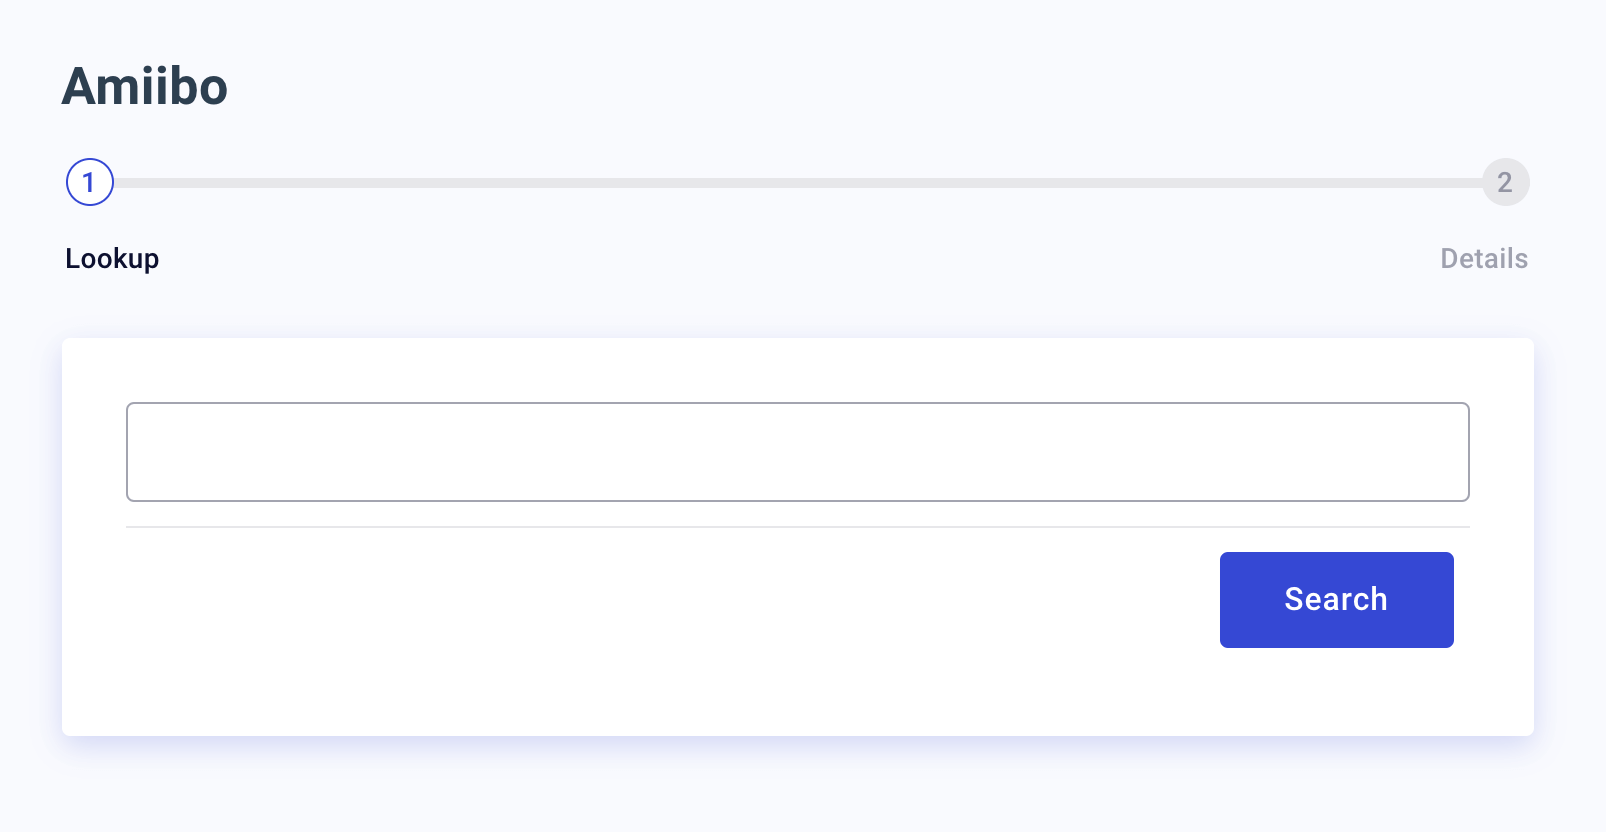
4. Frontend: User Interface
The frontend consists of a few pieces that work together to display your workflow to users. Workflows are exposed via a registration function containing default configuration values and workflow specific properties. One of these properties is the component that should be rendered for this workflow. Once we have that component we need to register the new workflow on the Clutch application.
Scaffolding
To simplify the creation of workflows you can run a scaffolding tool. It will prompt you for some information and produce a new workflow with some templates.
To get started run the generator within Clutch and provide the details about our Amiibo workflow.
> make scaffold-workflow
*** Is the destination okay:
> clutch/frontend/workflows
Is this okay? [Y/n]: n
Enter the destination folder [clutch/frontend/workflows]: {path_to_gateway}/frontend/workflows
Is this a wizard workflow? [Y/n]: Y
Enter the name of this workflow [Hello World]: Amiibo
Enter a description of the workflow [Greet the world]: Lookup all Amiibo by name
Enter the developer's name [dschaller]: Lyft
Enter the developer's email [derek@lyft.com]: hello@example.com

*** Generating...
*** All done!
Building out the Workflow
You should now have a new Amiibo workflow in the destination directory outlined in the CLI (e.g. {path_to_gateway}/frontend/workflows. However, this scaffolding left behind some default values that we should update.
Component
Let's update the component.
Define a functional component for the amiibo lookup by adding the highlighted lines.
import type { ChangeEvent } from "react";
import React from "react";
import { Button, ButtonGroup, TextField, useWizardContext } from "@clutch-sh/core";
import { useDataLayout } from "@clutch-sh/data-layout";
// WizardStep will display a warning at the end of this step. That's ok!
// It'll be unused temporarily now that WelcomeStep is commented out.
// In a future step this will be used again.
import type { WizardChild } from "@clutch-sh/wizard";
import { Wizard, WizardStep } from "@clutch-sh/wizard";

import type { WorkflowProps } from ".";

// Remove or comment out this code generated by the scaffolding.
// const WelcomeStep: React.FC<WizardChild> = () => (
//   <WizardStep isLoading={false} error={undefined}>Hello World!</WizardStep>
// );

const AmiiboLookup: React.FC<WizardChild> = () => {
  const { onSubmit } = useWizardContext();
  const userInput = useDataLayout("userInput");

  const onChange = (event: ChangeEvent<{ value: string }>) => {
    userInput.assign({ name: event.target.value });
  };

  return (
    <>
      <TextField onChange={onChange} onReturn={onSubmit} />
      <ButtonGroup>
        <Button text="Search" onClick={onSubmit} />
      </ButtonGroup>
    </>
  );
};

const HelloWorld: React.FC<WorkflowProps> = ({ heading }) => {
  const dataLayout = {};
  return (
    <Wizard dataLayout={dataLayout} heading={heading}>
      {/* Remove or comment out this code generated by the scaffolding. */}
      {/* <WelcomeStep name="Welcome" /> */}
      <AmiiboLookup name="Lookup" />
    </Wizard>
  );
};

export default HelloWorld;
There are two new imports (@clutch-sh/core and @clutch-sh/data-layout) added in the code above. Let's add these to the workflows dependencies.
{
  "name": "@clutch-sh/amiibo",
  "version": "0.1.0",
  "private": true,
  "description": " Lookup all Amiibo by name",
  "license": "Apache-2.0",
  "author": "hello@example.com",
  "main": "dist/index.js",
  "scripts": {
    "clean": "rm -rf ./dist && rm -f tsconfig.tsbuildinfo",
    "compile": "tsc -b",
    "compile:dev": "esbuild --target=es2019 --outdir=dist --sourcemap src/*.tsx",
    "compile:watch": "yarn compile:dev --watch",
    "lint": "eslint --ext .js,.jsx,.ts,.tsx .",
    "lint:fix": "yarn run lint --fix",
    "test": "jest --passWithNoTests",
    "test:coverage": "yarn run test --collect-coverage",
    "test:watch": "yarn run test --watch"
  },
  "dependencies": {
    "@clutch-sh/core": "^3.0.0-beta",
    "@clutch-sh/data-layout": "^3.0.0-beta",
    "@clutch-sh/wizard": "^3.0.0-beta",
    "react": "^17.0.2",
    "react-dom": "^17.0.2"
  },
  "devDependencies": {
    "@clutch-sh/tools": "^2.0.0-beta"
  },
  "engines": {
    "node": ">=16.0.0 <17",
    "yarn": "^1.22.5"
  }
}
This will present a text field which updates a data layout called userInput on changes and a button for users to click when they are ready to search.
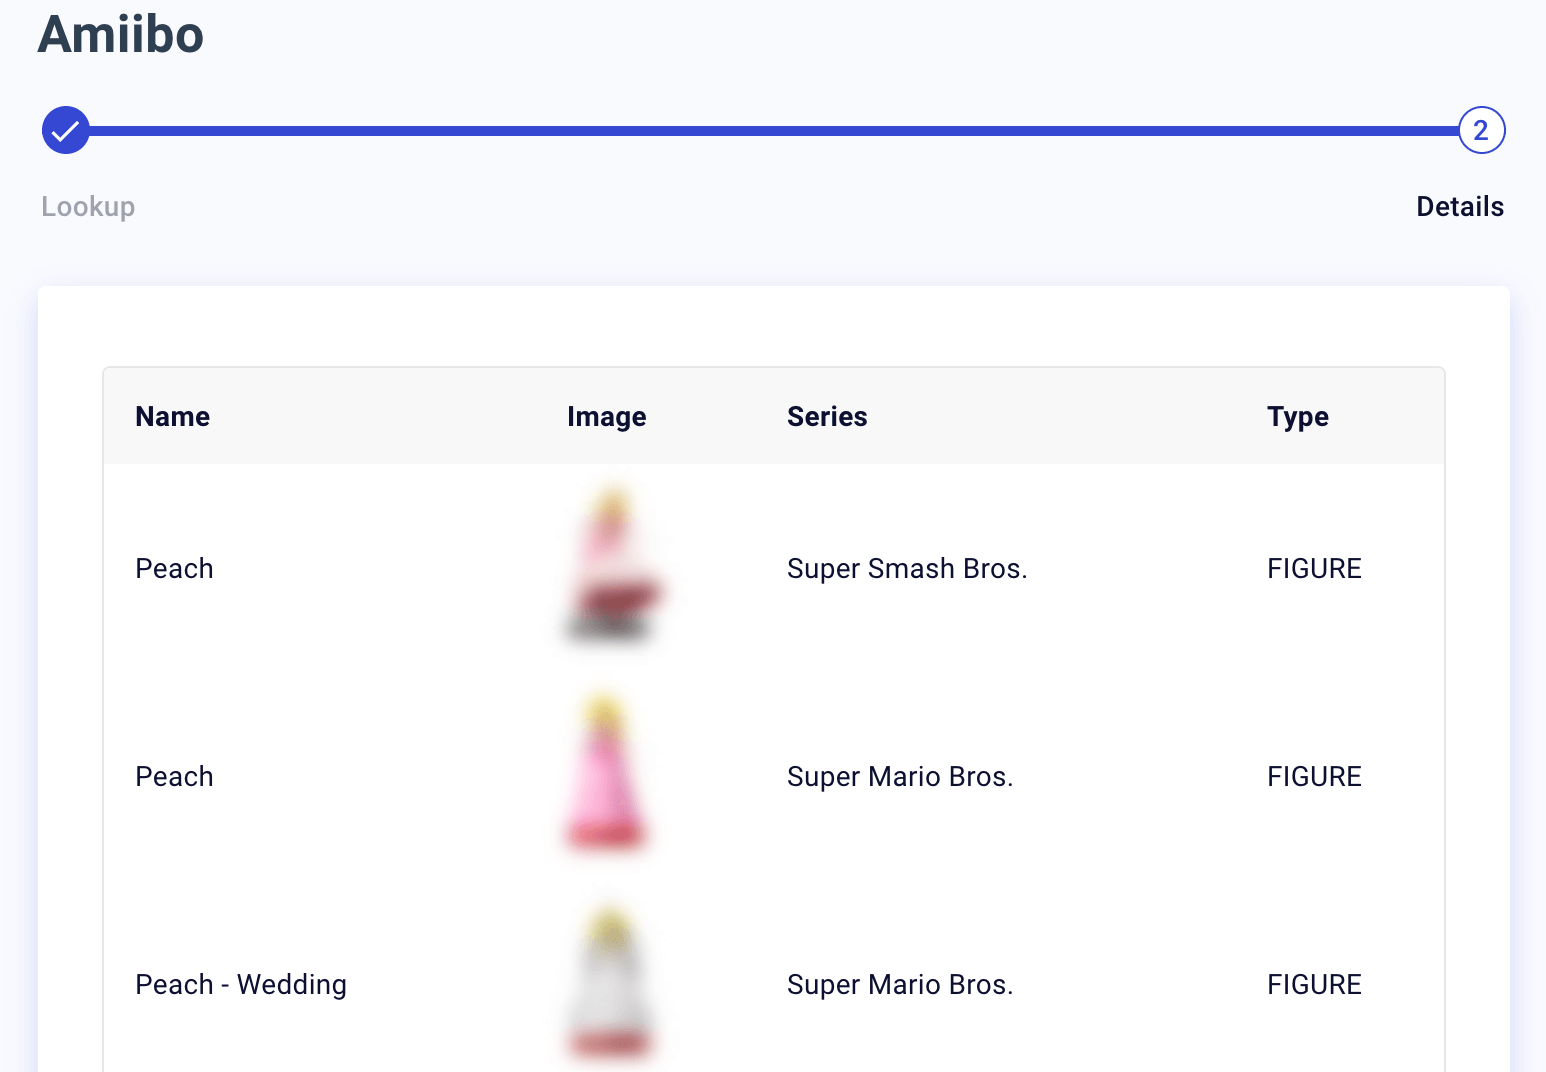
Now let's build a way to display the details panel.
import type { ChangeEvent } from "react";
import React from "react";
import { Button, ButtonGroup, Table, TableRow, TextField, useWizardContext } from "@clutch-sh/core";
import { useDataLayout } from "@clutch-sh/data-layout";
import type { WizardChild } from "@clutch-sh/wizard";
import { Wizard, WizardStep } from "@clutch-sh/wizard";
import _ from "lodash";

import type { WorkflowProps } from ".";

const AmiiboLookup: React.FC<WizardChild> = () => {
  const { onSubmit } = useWizardContext();
  const userInput = useDataLayout("userInput");

  const onChange = (event: ChangeEvent<{ value: string }>) => {
    userInput.assign({ name: event.target.value });
  };

  return (
    <>
      <TextField onChange={onChange} onReturn={onSubmit} />
      <ButtonGroup>
        <Button text="Search" onClick={onSubmit} />
      </ButtonGroup>
    </>
  );
};

const AmiiboDetails: React.FC<WizardChild> = () => {
  const amiiboData = useDataLayout("amiiboData");
  let amiiboResults = amiiboData.displayValue();
  if (_.isEmpty(amiiboResults)) {
    amiiboResults = [];
  }

  return (
    <WizardStep error={amiiboData.error} isLoading={amiiboData.isLoading}>
      <Table columns={["Name", "Image", "Series", "Type"]}>
        {amiiboResults.map(amiibo => (
          <TableRow key={amiibo.imageUrl}>
            {amiibo.name}
            <img alt={amiibo.name} src={amiibo.imageUrl} height="75px" />
            {amiibo.amiiboSeries}
            {amiibo.type}
          </TableRow>
        ))}
      </Table>
    </WizardStep>
  );
};

const HelloWorld: React.FC<WorkflowProps> = ({ heading }) => {
  const dataLayout = {};
  return (
    <Wizard dataLayout={dataLayout} heading={heading}>
      <AmiiboLookup name="Lookup" />
      <AmiiboDetails name="Details" />
    </Wizard>
  );
};

export default HelloWorld;
There is another new import (lodash) added in the code above. Let's also add this to the workflows dependencies.
{
  "name": "@clutch-sh/amiibo",
  "version": "0.1.0",
  "private": true,
  "description": " Lookup all Amiibo by name",
  "license": "Apache-2.0",
  "author": "hello@example.com",
  "main": "dist/index.js",
  "scripts": {
    "clean": "rm -rf ./dist && rm -f tsconfig.tsbuildinfo",
    "compile": "tsc -b",
    "compile:dev": "esbuild --target=es2019 --outdir=dist --sourcemap src/*.tsx",
    "compile:watch": "yarn compile:dev --watch",
    "lint": "eslint --ext .js,.jsx,.ts,.tsx .",
    "lint:fix": "yarn run lint --fix",
    "test": "jest --passWithNoTests",
    "test:coverage": "yarn run test --collect-coverage",
    "test:watch": "yarn run test --watch"
  },
  "dependencies": {
    "@clutch-sh/core": "^3.0.0-beta",
    "@clutch-sh/data-layout": "^3.0.0-beta",
    "@clutch-sh/wizard": "^3.0.0-beta",
    "lodash": "^4.17.21",
    "react": "^17.0.2",
    "react-dom": "^17.0.2"
  },
  "devDependencies": {
    "@clutch-sh/tools": "^2.0.0-beta"
  },
  "engines": {
    "node": ">=16.0.0 <17",
    "yarn": "^1.22.5"
  }
}
Once the amiiboData data layout has been hydrated a table will be displayed with all amiibo matching the input criteria.
Let's tie these two components together.
import type { ChangeEvent } from "react";
import React from "react";
import {
  Button,
  ButtonGroup,
  client,
  Table,
  TableRow,
  TextField,
  useWizardContext,
} from "@clutch-sh/core";
import { useDataLayout } from "@clutch-sh/data-layout";
import type { WizardChild } from "@clutch-sh/wizard";
import { Wizard, WizardStep } from "@clutch-sh/wizard";
import _ from "lodash";

import type { WorkflowProps } from ".";

const AmiiboLookup: React.FC<WizardChild> = () => {
  const { onSubmit } = useWizardContext();
  const userInput = useDataLayout("userInput");

  const onChange = (event: ChangeEvent<{ value: string }>) => {
    userInput.assign({ name: event.target.value });
  };

  return (
    <>
      <TextField onChange={onChange} onReturn={onSubmit} />
      <ButtonGroup>
        <Button text="Search" onClick={onSubmit} />
      </ButtonGroup>
    </>
  );
};

const AmiiboDetails: React.FC<WizardChild> = () => {
  const amiiboData = useDataLayout("amiiboData");
  let amiiboResults = amiiboData.displayValue();
  if (_.isEmpty(amiiboResults)) {
    amiiboResults = [];
  }

  return (
    <WizardStep error={amiiboData.error} isLoading={amiiboData.isLoading}>
      <Table columns={["Name", "Image", "Series", "Type"]}>
        {amiiboResults.map(amiibo => (
          <TableRow key={amiibo.imageUrl}>
            {amiibo.name}
            <img alt={amiibo.name} src={amiibo.imageUrl} height="75px" />
            {amiibo.amiiboSeries}
            {amiibo.type}
          </TableRow>
        ))}
      </Table>
    </WizardStep>
  );
};

const HelloWorld: React.FC<WorkflowProps> = ({ heading }) => {
  const dataLayout = {
    userInput: {},
    amiiboData: {
      deps: ["userInput"],
      hydrator: (userInput: { name: string }) => {
        return client
          .post("/v1/amiibo/getAmiibo", {
            name: userInput.name,
          })
          .then(response => {
            return response?.data?.amiibo || [];
          });
      },
    },
  };

  return (
    <Wizard dataLayout={dataLayout} heading={heading}>
      <AmiiboLookup name="Lookup" />
      <AmiiboDetails name="Details" />
    </Wizard>
  );
};

export default HelloWorld;
Here we define the data layout structure and pass it to the wizard along with the functional components we built above as children.
Configuration
The final step is registering this new Amiibo workflow with the Clutch app. First update the component name by replacing the scaffolded default (HelloWorld) in our workflow's registration function.
import type { BaseWorkflowProps, WorkflowConfiguration } from "@clutch-sh/core";

import HelloWorld from "./hello-world";

export interface WorkflowProps extends BaseWorkflowProps {}

const register = (): WorkflowConfiguration => {
  return {
    developer: {
      name: "Name McName",
      contactUrl: "mailto:foo@foo-email.com",
    },
    path: "amiibo",
    group: "Amiibo",
    displayName: "Amiibo",
    routes: {
      landing: {
        path: "/lookup",
        description: "Lookup all Amiibo by name.",
        component: HelloWorld,
      },
    },
  };
};

export default register;
Next, open your clutch.config.js file and add the amiibo configuration highlighted below:
module.exports = {
  "@clutch-sh/amiibo": {
    landing: {
      trending: true,
    },
  },
}
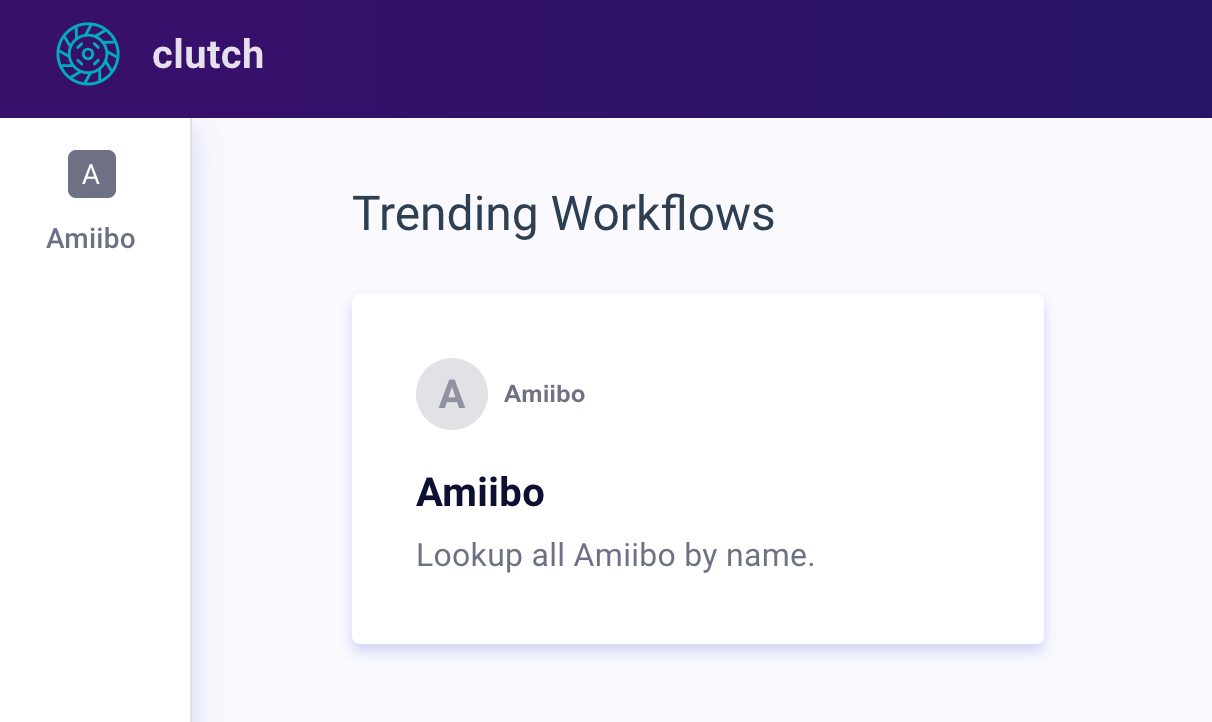
If everything is in order you should see an Amiibo card on the homepage that you can use to access your workflow!
That's it! You should be able to remove all the remaining generated code.
Test!
Run the frontend with the new workflow:
make frontend-dev
You should now be able to navigate to http://localhost:3000/amiibo/lookup to see your new workflow.
Try entering Peach into the input field and clicking search.
5. Additional Tutorials
Though not available yet, a future guide will cover how to incorporate the resolver pattern.